
This article was originally published at CoinCentral.com:
https://coincentral.com/ledger-nano-s-setup-guide-configuration-app-installation
Ledger Nano S Setup Guide
(Configuration + App Installation)
You’ve finally decided to bite the bullet and purchase a Ledger Nano S. Nice job! Storing your cryptocurrency on a hardware wallet is much more secure than using an online wallet or, god forbid, keeping them on an exchange. And, if you’re confused on how to start, we’re here to help you out with your Ledger Nano S setup.
Before we get started, though, there are a few things about your Ledger purchase to be aware of:
First – It’s highly recommended that you only purchase a Ledger from the official website. Doing so ensures that the wallet you receive hasn’t been tampered with.
Second – Just because your Ledger isn’t compromised doesn’t mean your computer isn’t. Make sure that your computer is clean with up-to-date antivirus software before connecting your Ledger.
Third – Don’t rush setting up or operating the wallet. Some parts can be tricky and a small mistake could mean the loss of your funds.
Without further ado, let’s get started. In this Ledger Nano S setup guide, we’ll go over:
How to Setup a Ledger Nano S
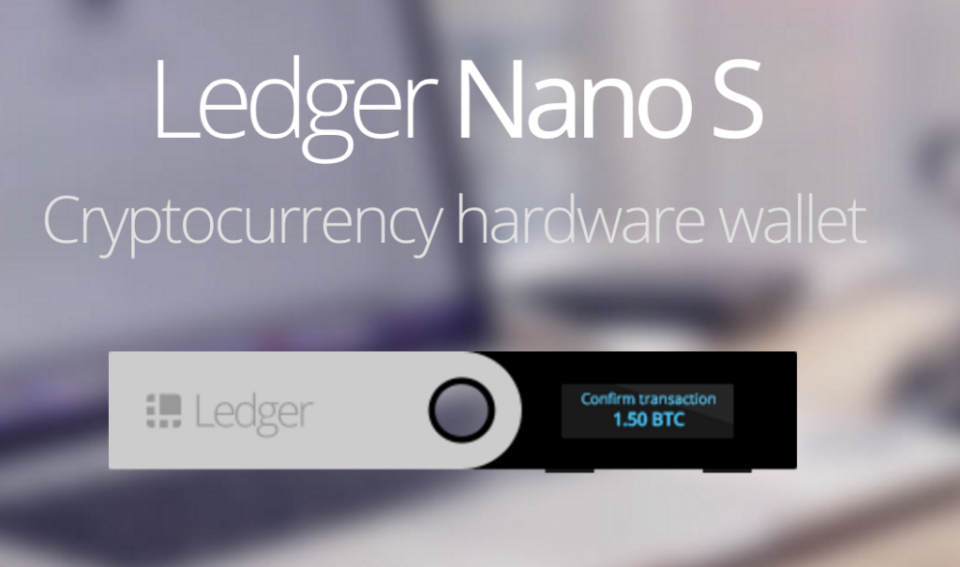
Step 1. Open up the box and get comfortable with the hardware. It’s a simple piece of metal, but it’s not very intuitive. There are four main components you should know about:
- Screen. This is where the action is. It’s small but contains almost every piece of important information. Addresses, seeds, menus, and amounts are all shown here.
- Left button. As the name suggests, this navigates you to the left. It also navigates you up in vertical menus.
- Right button. You guessed it. Tapping this will move you right in horizontal menus and down in vertical menus.
- Swivel cover. This is the sleek cover to your wallet. Just look how shiny it is.

*NOTE: Tapping both buttons at the same time is equivalent to hitting “Enter” or “Confirm”.
Step 2. Update your firmware. Other than during this initial setup, you should also do this each time Ledger releases a new update. These updates contain bug fixes, patches, and security improvements. Ledger has an up-to-date guide on exactly how to do this here.
Configuration
Step 3. With your Ledger Nano S connected to your computer, follow the instructions on the wallet screen. You will most likely have to choose to create a new wallet.
Step 4. After that set a pin code. The pin code is what you’ll enter to unlock the Ledger each time you use it. This needs to be between 4 and 8 characters – the longer it is, the less of a chance someone will be able to guess it. Don’t be the guy who puts ‘0000’ as his pin code.

*NOTE: Memorize your pin code. Entering your pin code incorrectly 3 times will reset your Ledger.
Recovery
Step 5. Write down your recovery phrase. You may also hear this called a recovery seed. This is what you need to enter if you ever lose your Ledger or forget your pin code. The wallet screen will show 24 words in a specific order. You need to write down the words on your recovery sheet in the exact same order. The recovery sheet should be included in the box with your Ledger Nano S and USB cord.

*NOTE: Your recovery sheet should not be pre-filled. A common scam, especially on eBay, involves selling already activated Ledgers with pre-filled recovery sheets. If your sheet already contains a recovery seed, we recommend you buy a new Ledger Nano S from the official website.
Step 6. Once you have the recovery phrase written down, tap “continue” on the Ledger. Next, your Ledger will quiz you on a few different words to check that you wrote them out in the correct order.
*NOTE: Do not lose your recovery sheet. Without the recovery seed, you have no way of accessing your funds if your Ledger is lost, stolen, or if you forget your pin code.

We recommend storing multiple copies of your recovery phrase in secure locations separate from where you keep your Ledger Nano S.
Step 7. After confirming again, you should be set. You’ve now configured your Ledger Nano S and it’s ready to use.

Sign Up Now For Our
Weekly Newsletter
Everything crypto is changing so fast it’s hard to keep up – UNTIL NOW!
Get curated news and information from leading industry experts, delivered right to your inbox and never miss another rally or flash crash.
Get started today for FREE.
Installing Ledger Apps
After configuring your Ledger Nano S, the next thing you’ll want to do is install the appropriate apps. Each app has a slightly different interface and set of download instructions. For this article, we’ll just cover what each app is and give an overview of the coins they support.
There are three wallet apps you’ll potentially use and one app manager to add and remove additional apps from your Ledger Nano S. You need to connect and enter your pin code on your Ledger Nano S to operate these apps. Find your coins on this list from Ledger to see which app you should download.
*NOTE: The Ledger Nano S doesn’t support every coin. Sometimes, your only option for storage is the coin’s official wallet. However, Ledger is continuously adding support for new coins, so be on the lookout for announcements from the team.
Ledger Wallet Bitcoin (& Altcoins)
The Bitcoin wallet app supports Bitcoin and the majority of altcoins that aren’t ERC20. It’s available for you to download on Windows, Mac, Linux, or Chrome OS.
Ledger Wallet Ethereum
The Ethereum wallet app supports Ethereum, Ethereum Classic, and ERC20 tokens. It works in combination with MyEtherWallet to secure your funds. You need Google Chrome for this one as it’s a Chrome app. But, with Chrome you can still use it on Windows, Mac, Linux, and Chrome OS.
Ledger Wallet Ripple
The Ripple wallet app is obviously for Ripple. It’s available for Windows, Mac, and Linux operating systems.
Ledger Manager
The Ledger Manager isn’t a wallet; it’s an app manager for other wallets that you can install on your Ledger Nano S. You need to use this to install wallets for altcoins, like Dash and Dogecoin, that aren’t ERC20 tokens. This is also where you update your firmware after the initial setup. The manager is available as a Chrome app on Windows, Mac, Linux, and Chrome operating systems.

*NOTE: These four apps are for your computer/laptop while the apps you download through the Ledger Manager are for your Ledger Nano S. If you download, say the Dash wallet, from the Ledger Manager you’ll access it through the Bitcoin wallet on your computer.
Ledger Nano S Resources
And with that, you’ve got a configured Ledger Nano S with the appropriate wallet apps. You can also check out the resources below for more information from Ledger:

Subscribe To Our Newsletter
Subscribe to our email newsletter today to receive updates on the latest news, tutorials and special offers.

